Skip to content



Bathroom waterproofing is a continuous sealed layer behind your tile and under your floor that sends every drop of water to the drain. It goes in before the tile, because tile and grout let moisture through over time. Get that hidden layer right and you avoid most leaks, most mold, and the slow rot that turns a small repair into a rebuilt wall.
This bathroom waterproofing guide is written for Los Angeles homeowners. Many homes here were built decades before modern membranes existed, and plenty of them sit on raised wood subfloors that do not forgive a slow leak. Whether you are fixing one shower or working through a complete bathroom remodeling plan, the waterproofing stage deserves more of your attention than the tile you pick.
Key Takeaways
- Tile and grout are a finish. The waterproof layer is the membrane underneath, and it has to be continuous from the walls down to the drain.
- Most leaks start at joints and edges. Corners, curbs, niches, drains, and valve openings fail far more often than the flat wall.
- There are several sound systems, including hot mop, sheet membrane, and liquid membrane. A clean install matters more than the brand.
- A flood test before tile is the cheapest insurance in the whole project. It catches a leak while fixing it is still easy.
- In the City of Los Angeles, a non-structural bathroom remodel is on the LADBS express permit list. Confirm your exact scope with LADBS before work begins.
- Waterproofing handles liquid water. Mold control also needs a working exhaust fan.
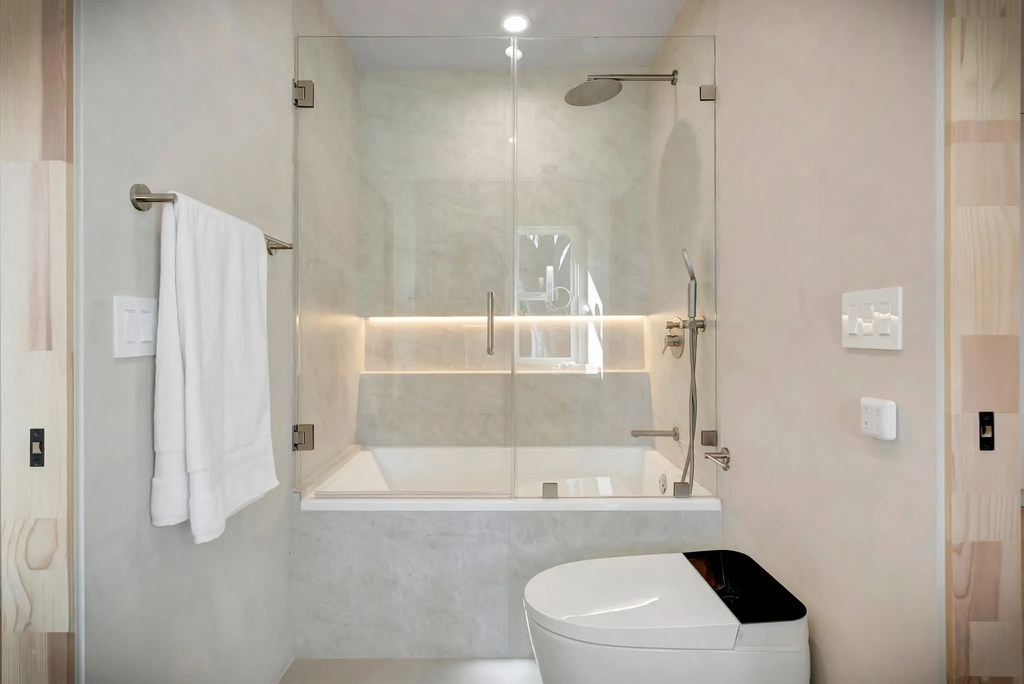
What Is Bathroom Waterproofing, and Why Does It Matter in LA Homes?
Bathroom waterproofing is the barrier installed between your tile and the structure of your home. It covers the shower floor, runs up the walls, wraps the curb, and ties into the drain so water has no path into the framing. Without it, a shower can look perfect for a few years while the wall behind it quietly soaks.
People often assume the tile does this job. It doesn’t. Grout is porous, and even cement backer board only tolerates water without stopping it. Moisture passes through both and keeps going until it meets something sealed.
A few things make this more pressing in Los Angeles:
- Older housing: Many bathrooms were built with methods that have simply aged out, and some have been patched over more than once.
- Raised foundations: A wood subfloor over a crawl space can hide a slow leak for years.
- Ground movement: Small shifts over time can open hairline cracks in rigid, brittle waterproofing.
The dry climate adds a false sense of safety. We often find this on bathroom remodels in Pasadena and similar older neighborhoods, where the room looked dry and the damage sat entirely inside the wall.
Where Do Bathroom Leaks Usually Start?
Most bathroom leaks start at a joint, an edge, or a hole in the waterproofing, and very few start in the middle of a wall. Good bathroom leak prevention is mostly about getting those transitions right. If you know where to look, you can ask sharper questions during a remodel.
These are the spots that fail most often:
- The shower pan and curb: A liner that sits flat with no slope holds water. Nails or screws driven through the curb are a classic cause.
- The drain connection: The membrane has to be clamped or bonded to the drain body. A gap here leaks with every shower.
- Inside corners and seams: Walls move slightly against each other, so corners need reinforcement.
- Niches and benches: Every shelf adds corners and a flat surface where water can sit.
- Valve and shower head openings: Each pipe through the wall is a hole that needs its own seal.
- The tub edge: Where the tub flange meets the wall board, water can wick upward if the lap is wrong.
The rest of the room counts too. A failed toilet seal or a supply line under the vanity can soak a subfloor just as thoroughly as a bad shower. That is why the choice of bathroom flooring materials affects how well the room copes with splashes and the occasional overflow.
What Are the Main Bathroom Waterproofing Methods?
The main bathroom waterproofing methods are hot mop, a traditional pan liner, sheet membrane, liquid membrane, and foam board systems. All of them can work for decades when installed carefully. They differ in build-up thickness, drying time, and how much skill the corners demand.
| Method | How it works | Often chosen for | Watch for |
| Hot mop | Layers of roofing felt bonded with hot asphalt to form the shower pan | Standard curbed showers. Long established in Southern California | Needs a specialist crew. Strong odor during install |
| Pan liner (PVC or CPE) | A flexible sheet under a mortar bed, clamped to the drain | Traditional mortar-bed showers | Must sit on a pre-slope. No fasteners low on the curb |
| Sheet membrane | Thin waterproof sheets bonded directly under the tile | Walls, niches, and curbless showers | Seam overlaps and corners must follow the maker’s instructions |
| Liquid membrane | Rolled or troweled on, then cures into a rubbery film | Odd shapes and tight spaces | Too thin a coat is the common failure. Thickness must be checked |
| Foam board system | Waterproof boards with sealed joints replace backer board | Faster builds and lighter walls | Higher material cost. Joints and screw heads need sealing |
If you are comparing bonded membranes, ask whether the product is tested to ANSI A118.10. That is the tile industry standard commonly referenced for waterproof membranes under thin-set tile.
On cost, quotes vary widely with shower size and the system used. Reported ranges for waterproofing a standard shower commonly fall somewhere between several hundred dollars and around two thousand, usually as one line within a larger remodel. These are just estimates, and the final call should always be verified while working.
Which Bathroom Waterproofing Membrane Is Right for Your Shower?
The right bathroom waterproofing membrane depends on your shower’s shape, your floor structure, and who is installing it. There is no single best product. A system your installer has put in a hundred times will usually outperform a premium one they are trying for the first time.
A few practical pointers help narrow it down:
- Curbless or walk-in shower: A bonded sheet or liquid membrane is the usual choice, because the waterproofing has to extend well past the shower itself and across the bathroom floor.
- Standard curbed shower on a wood subfloor: Hot mop and pan liners are both common here, with a bonded membrane on the walls above.
- Lots of niches, benches, or angles: Liquid membranes handle awkward shapes well, as long as the coating thickness is measured and not guessed.
- Tight schedule: Foam board and sheet systems can often be tiled sooner than systems that need long cure times.
The decision is easier when it is made early. Your bathroom layout and design choices set the drain position, the curb style, and the number of corners, and each of those shapes which membrane makes sense.
One rule applies to every system. Stay within a single manufacturer’s products from drain to wall where you can. Mixing a membrane from one brand with a drain or sealant from another is a common reason warranties get declined.
How Do You Waterproof a Bathroom, Step by Step?
The short version of how to waterproof a bathroom is this: fix the structure, build the slope, install the membrane, test it with water, and only then tile. The order matters more than any single product. Skipping ahead is where most failures begin.
- Strip back and inspect: Remove old tile and board down to the framing in wet areas. Check studs and subfloor for soft spots or staining, and replace anything damaged.
- Finish the rough plumbing: The valve, drain, and supply lines go in and get pressure tested before the walls close.
- Build the slope: The surface under the waterproofing should fall toward the drain, commonly around a quarter inch per foot. A flat pan holds water inside the mortar bed.
- Install the backer: Cement board or foam board goes on the walls. Standard drywall and moisture-resistant “green board” do not belong inside a shower.
- Apply the membrane: Start with corners, seams, and pipe openings, then cover the field. Wrap the curb fully and run the wall membrane over the pan so water sheds downward.
- Flood test: Plug the drain, fill the pan, mark the water line, and wait. Many installers leave it for a full day. A drop in the level means a leak to find now.
- Get it inspected: If the job is permitted, the inspector sees the waterproofing before it is covered.
- Tile, grout, and seal: Use flexible sealant at corners and changes of plane, since grout cracks there.
- Let it cure: Follow the product’s cure times before the first shower.
Can a handy homeowner do this? The steps are learnable, but the margin for error is thin and the mistakes stay hidden until the damage is done. For a main shower, most people are better served by an experienced installer.
Do You Need a Permit and Inspection for Shower Waterproofing in Los Angeles?
In most cases, yes. If you are rebuilding a shower or remodeling a bathroom in the City of Los Angeles, expect a permit and at least one inspection. The good news is that the process for a typical bathroom is usually simpler than people fear.
Here is what we could confirm from official sources:
- Express permits: The Los Angeles Department of Building and Safety lists “kitchen/bathroom remodel for residential buildings (no structural changes)” among the work eligible for an LADBS express permit. Express permits are issued without plan check.
- Structural changes: Work that goes beyond that description, such as moving walls or altering floor framing for a curbless shower, generally falls outside the express route and may need plan review.
- Inspections: LADBS states that all work requiring a permit is subject to inspection, and that the permit holder is responsible for notifying the inspector when the work is ready.
- Shower pan testing: The California Plumbing Code calls for site-built shower pans to be tested for watertightness. The exact fill depth and hold time depend on the code edition in force and your inspector, so ask before the test is set up.
The practical point is timing. Waterproofing has to be seen before tile covers it, so the inspection needs to be booked into the schedule and not squeezed in afterward.
Jurisdiction matters as well. The rules above apply to the City of Los Angeles. A full bathroom update in Altadena goes through Los Angeles County, and cities such as Burbank and Glendale run their own building departments with their own steps.
At Top of Mind Home Remodeling, we confirm the permit path with the local department before demolition starts. Please treat everything in this section the same way. These are just estimates of how the process usually runs, and the final call should always be verified while working.
How Do You Keep Mold From Coming Back?
You keep mold away by removing the moisture it feeds on, which takes two things working together: a sealed wet area and steady ventilation. The best bathroom waterproofing solutions stop liquid water from reaching the structure. They do nothing about the steam that settles on ceilings, paint, and grout after every shower.
That second half is where many bathrooms fall short. A few habits and upgrades make a real difference:
- Run the fan longer: Leave it on for around 20 minutes after a shower. A timer or humidity-sensing switch does this for you.
- Check where the fan vents: It should discharge outdoors. A fan that empties into the attic only moves the problem.
- Dry things quickly after a leak: The U.S. Environmental Protection Agency advises drying wet materials within 24 to 48 hours to help prevent mold growth indoors.
- Renew the sealant: Flexible sealant at corners and around the tub wears out sooner than tile. Replace it when it cracks or pulls away.
Fan sizing and controls are also covered by California’s building standards, so a remodel is a sensible time to upgrade. A proper bathroom ventilation setup pairs with the membrane, and each covers what the other cannot. If mold keeps returning in the same spot despite good airflow, treat that as a clue. Surface cleaning will not fix a wall that is wet from the inside.
Case Study: A Hall Bathroom Leak That Started at the Curb
A homeowner came to Top of Mind Home Remodeling with a hall bathroom in a mid-century ranch house. Two tiles at the base of the shower curb had come loose, and the closet on the other side of the wall smelled musty. The shower had been retiled about eight years earlier and still looked fine from the inside.
What we found. We opened the wall from the closet side first, to avoid breaking tile we might not need to remove. The bottom of two studs was dark and soft. Once the shower floor came up, the cause was clear:
- The pan liner had been laid flat on the subfloor with no slope beneath it.
- The curb had been fastened with nails driven straight through the liner.
- The walls behind the tile were moisture-resistant drywall, with no membrane.
Water had been sitting in the mortar bed for years and escaping through the nail holes every time the shower ran.
What we did. We took the shower back to the framing and replaced the damaged stud sections and a patch of subfloor. From there we rebuilt in order. A sloped base went in first, then new backer board, then a bonded membrane across the pan, curb, walls, and niche. We filled the pan and left it for a full day. The water line did not move. The work was inspected before any tile went on.
What changed. The homeowner got a shower that drains fully, a closet that dried out, and photos of every hidden layer for their records. The repair cost noticeably more than proper waterproofing would have cost during the original retile. That gap is the real lesson here.
It is a pattern we come across on bathroom remodeling in Sherman Oaks and across the Valley, where many homes have had at least one earlier bathroom update. A newer-looking shower tells you very little about what sits behind it.

What Are the Warning Signs That Your Waterproofing Has Failed?
The clearest bathroom waterproofing warning signs are loose tiles, a musty smell that returns after cleaning, and stains on the far side of a shower wall. Failed waterproofing rarely announces itself with a puddle. It shows up slowly, and usually somewhere other than the shower.
Keep an eye out for these:
- Tiles that sound hollow when tapped, or that have shifted near the floor or curb
- Grout that stays dark long after the shower has dried
- Peeling paint or swollen baseboards in the next room
- A ceiling stain below an upstairs bathroom
- A soft or spongy feel in the floor near the tub or toilet
- Mold that comes back in the same corner within weeks
One sign alone is not proof of a leak. Two or more together are worth a proper look, ideally with a moisture meter and before anything gets regrouted or painted over. Covering the symptom buys time for the damage to spread.
If you are already planning a remodel, ask your contractor three questions. Which waterproofing system will be used? Will the pan be flood tested? Can you see the membrane before tile goes on? These are the same questions we expect homeowners to ask us at Top of Mind Home Remodeling, and a confident installer will be glad to answer them.
Frequently Asked Questions
Is tile and grout waterproof on its own?
No. Tile sheds most surface water, but grout is porous and lets moisture through. The waterproofing is the membrane or pan installed underneath. Sealing grout helps with stains and does not turn it into a water barrier.
Is cement board waterproof?
Cement board holds up when it gets wet, but water still passes through it. It needs a waterproof membrane over it, or a barrier behind it, depending on the system. Foam boards made for showers are the exception, since the board itself is the barrier once the joints are sealed.
How long does bathroom waterproofing last?
A correctly installed system is generally expected to last as long as the tile above it, often decades. Lifespan depends far more on installation quality than on the product. Flexible sealant at corners is the part that needs periodic renewal.
Can you waterproof over existing tile?
Some products are rated for it, and it can suit a low-risk area. For a shower that has already leaked, it is rarely a sound fix, because the damage and the failed layer stay in place underneath. Opening the wall is usually the honest answer.
How much does it cost to waterproof a shower in Los Angeles?
Reported ranges commonly run from several hundred dollars to around two thousand for a standard shower, depending on size and system. Structural repairs, if any are found, sit on top of that. These are just estimates, and the final call should always be verified while working.
Do I need a permit to redo my shower in Los Angeles?
Usually, yes. LADBS lists non-structural bathroom remodels among the work eligible for an express permit, which is issued without plan check. Other cities in the county have their own rules, so confirm with your local building department first.
How long should a flood test last?
Many installers leave the pan filled for a full day so a slow leak has time to show. The minimum your inspector accepts may be shorter and depends on the code in force. Ask your inspector what they need to see.
A Final Word
Bathroom Waterproofing is the part nobody will ever compliment, and it decides how long everything else lasts. The membrane, the slope, and the flood test all happen before a single tile goes on, which is exactly why they are easy to rush. Ask to see that layer. Ask how it was tested. Keep the fan running after every shower, and treat a recurring musty smell as a reason to look closer. If you would like a second opinion on a leak or a remodel plan, you can talk to our team at Top of Mind Home Remodeling.